How to embed your AI chatbot
When you’re done with creating your machine learning type, and you’ve quality assured its content, it is time to embed the AI chatbot on your website. This is easily accomplished if you can somehow add a JavaScript inclusion tag on your site. All modern CMS systems have this capability, but the process differs for different platforms, so please check up your system specifically for how to achieve this before proceeding.
The embed form
Your machine learning type has an “embed” button. If you click this button you will be served something resembling the following.
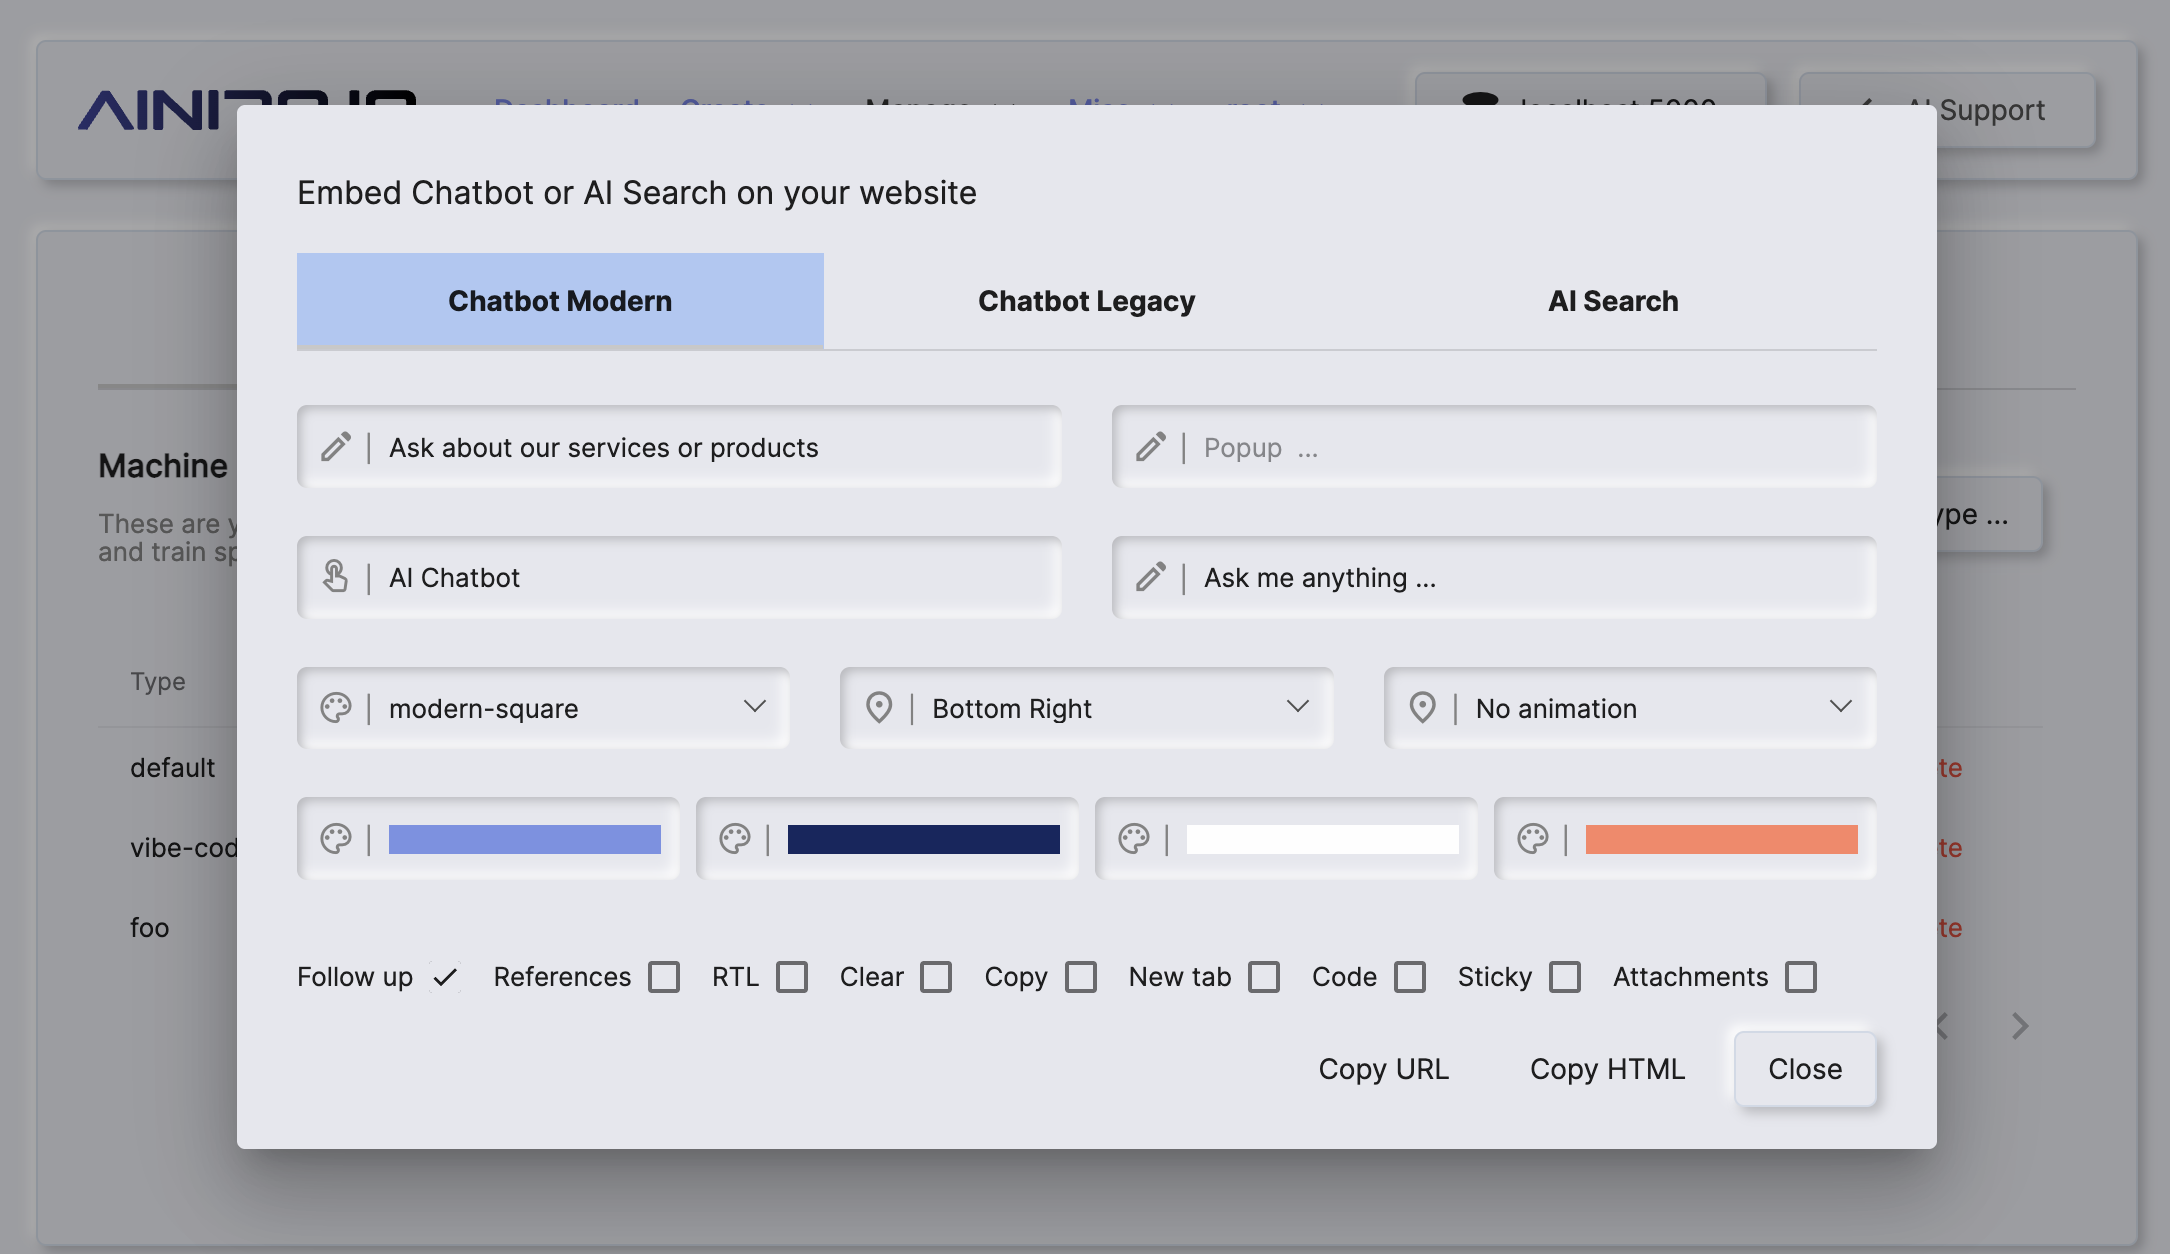
Since all of the above settings reflects a query parameter, this allows you to manually edit the embed script assuming you can somehow ensure your parameters are valid and URL encoded. Below is an exhaustive list of what query parameters the embed script supports:
- type - The full name of your machine learning type
- header - The header of the chat window
- button - The text of the chatbot button that opens the window
- rtl - Implies “right to left” and allows for creating a user interface for RTL languages
- color - The color of the text in the chatbot
- start - The “starting” color of the background
- end - The “ending” color of the background
- link - The color of hyperlinks inside the chat window
- theme - The name of your theme / css / skin
- references - If true, will return references from the backend for training snippets having URL citations
- file - Allows for overriding the JavaScript file actually used
- placeholder - The placeholder text for the textbox field in the chat window
- position - Positioning of the chatbot button and window. Must be either “right” or “left”
- clear_button - If true, adds a clear button, that allows the user to clear his current session and create a new session
- copyButton - If true, adds a “copy response” button for every response provided by the LLM
- follow_up - If true, adds the required JavaScript parts to support follow up questions. Notice, the system instruction needs to be correctly changed for this to work
- new_tab - If true, opens up all hyperlinks in a new browser tab
- code - If true, will add the required logic to syntax highlight code when the LLM returns code segments
- animation - Allows for referencing an animation CSS selector. Notice, currently only “ainiro_blink” is supported, which you can see on our website
- popup - “Popup text” that’s shown 5 seconds after the AI chatbot loads, to make it slightly more “instrusive” and visible. Check our website for an example
- hidden - If true, displays the chatbot’s button invisible, allowing you to create your own chatbot button to trigger the actual chatbot window
- sticky - If true, will automatically reopen the chatbot when the user is navigating to a new page, and the chatbot was already visible on the previous page
- attachments - If true, allows your users to attach files and upload these to the LLM
- extra - Additional extra parameters, which can be anything, and is typically used for complex integrations where “instance information” is required on a “per chatbot window” basis
- history - If true the chatbot will allow its users to see historical requests and continue previous conversations.
Most of the above query parameters have a GUI equivalent in the embed screen as seen in the above screenshot. Let’s dive into some of the most important settings from above and see how they change your AI chatbot’s look and feel.
The colors of your AI chatbot
The AI chatbot is actually using two background colors. These two colors are extrapolated as a linear gradient typically, allowing you to create a “gradient effect” if you wish. The start setting is the top color and the end setting is the color the gradient will end on.
It is typically smart to use lighter colors as your start value and heavier or darker colors in the same spectrum as your end value. This creates a “sun effect” and resembles the way things are in real life, since the sun always shines from the top, making darker colors further down in the same object. Exactly how these colors are being used, varies from theme to theme, but below you can see how the “bubbles” theme uses these colors.
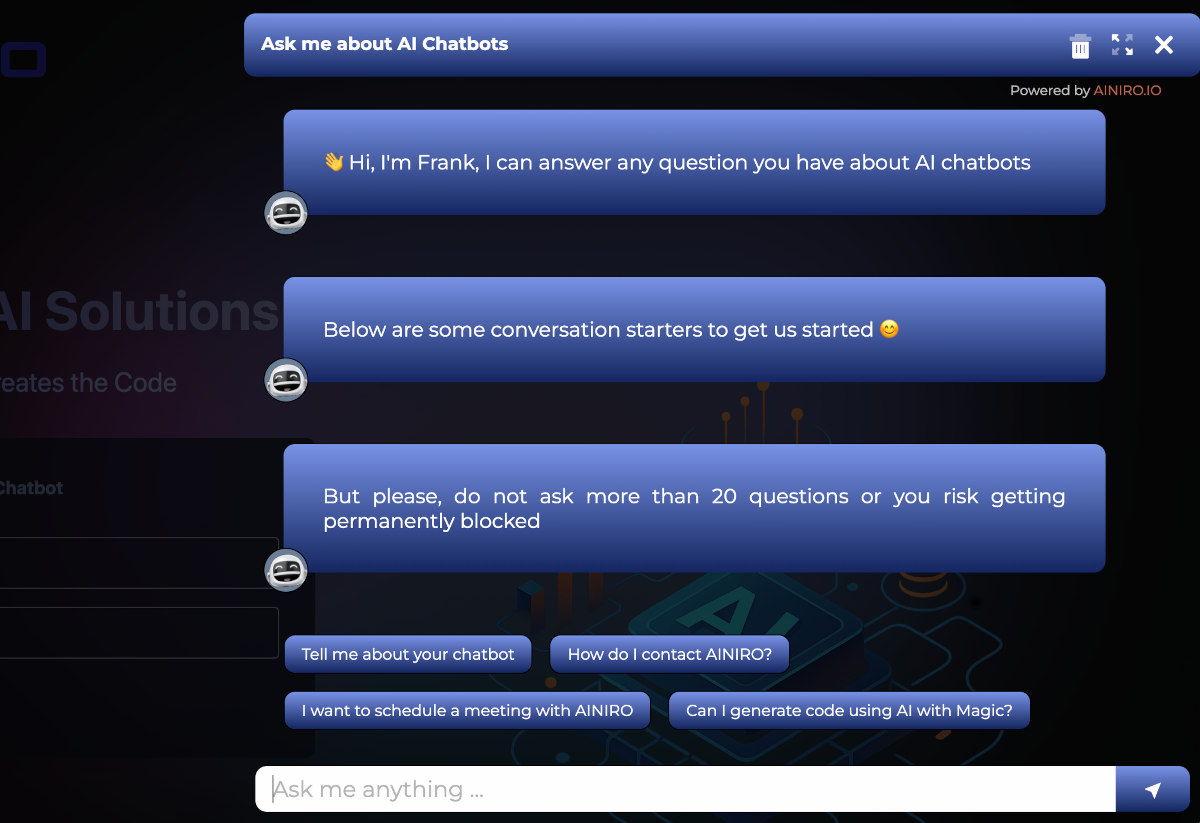
The link setting again is for hyperlinks, allowing you to provide a hexadecimal value, that becomes the color of hyperlinks inside the chatbot window. The color setting is for plain text. Both of these requires hex values, such as for instance #fefefe which is off white.
RTL
RTL implies “right to left” and is the way Hebrew, Arabic, and Farsi is written. By settings this property to true, the chatbot will add the required HTML to render these languages correct. If you know for a fact that all your users will be writing in Arabic, Farsi, or Hebrew (or another language which is RTL-based), you can set this setting to true.
Rolling your own button
If you set the hidden query parameter to true then the JavaScript file will not render the chatbot button. This is useful if you want to roll your own button, such as we’ve actually done in the Magic dashboard ourselves. Below you can see we’ve got
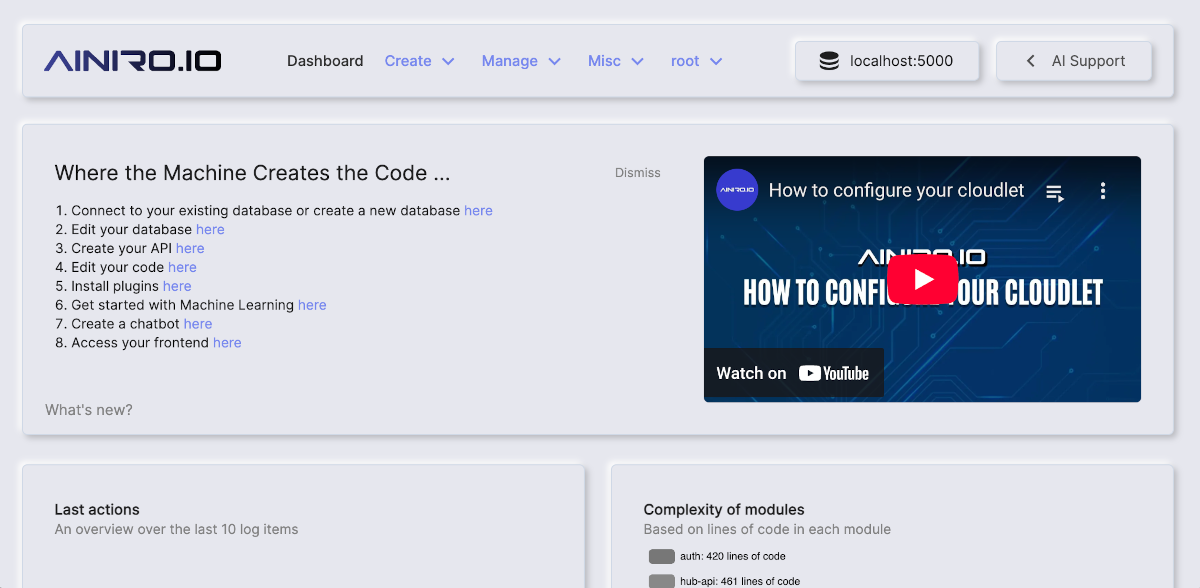
In the above screenshot you can see a button in the top right corner with the text “AI Support”. This button doesn’t have anything to do with the chatbot itself, but is a custom button which once clicked executes the following JavaScript code.
window.ainiro.show();
The above JavaScript will open the chat window and allow the user to have a conversation with the LLM.
Follow up questions
In order to have the follow_up setting correctly work, you will need to add something such as the following to your system instruction.
### Follow up questions instructions

- Always finish your response with a carriage return, ---,
and 3 follow up questions the user can ask you related to
the context, unless you are about to execute a function.
These questions are intended to be displayed to the user
as example follow up questions the user can ask you.
DO NOT RETURN THESE AS QUESTIONS TO THE USER, RETURN THESE
AS EXAMPLE QUESTIONS THE USER CAN ASK YOU. Never return
follow up questions if you're about to execute a function.

#### Example of follow up questions

RESPONSE HERE

---
* What's the price?
* What's your best selling product?
* How can I contact you?

In the above paragraph you can find an example of a response
and its follow up questions.
The reasons is because it’s the LLM’s job to actually generate follow up questions that are relevant to the current context and previous questions. However, you still have to make sure the follow_up query parameter is set to true to allow for the frontend to correctly render these as follow up questions.
References
References or citations will ensure that all training snippets having a valid URL value will be listed as citations at the bottom of the chat window after the LLM is done responding. This is useful for complex answers, where you might want to have users being able to check up the source for the chatbot’s answer. These references are shown such that the closest “match” will show first.
This is a highly useful feature for AI chatbots you’d like to behave more like a “search AI” than an AI chatbot, since it will list all URLs and allow the user to find the source document for the LLM’s answer.
Notice, only training snippets with a valid URL will be shown here, and only unique or distinct URLs will show up.
Custom themes
By default, Magic comes with 5 themes out of the box. These are as follows:
- modern-bubbles
- modern-clear
- modern-small-theme
- modern-square
- modern
The theme query parameter can be any of these. However, you can also roll your own custom theme entirely, at which point you can completely override the look and feel of the chatbot. See the previous link for details about how to accomplish this.