Dashboard
The Magic Dashboard is how you would manage your cloudlet. When you login to your cloudlet, you will be greeted by the dashboard’s landing page, showing key numbers about your cloudlet - its Magic version, and how many endpoints, users, scheduled tasks, and log items it has.
Your cloudlet is an AI agent (MCP)
Every Magic cloudlet can act as an AI agent through its built-in MCP server. Connect an orchestrator AI - such as Claude, Claude Code, Cursor, or Codex - to your cloudlet, and it can discover and invoke your endpoints as tools, query your databases, generate new Hyperlambda, and even build new tools for itself on demand. As soon as the MCP module is installed, the dashboard’s landing page shows your MCP URL together with a “Copy MCP URL” button. If the MCP or OAuth plugins are not yet installed, the landing page instead shows a “Turn this cloudlet into an AI agent” card, installing both plugins for you with a single click. This is the preferred way to work with Magic - you orchestrate, and the AI builds and runs your backend for you.
The landing page
When you log in, the dashboard typically resembles the following.
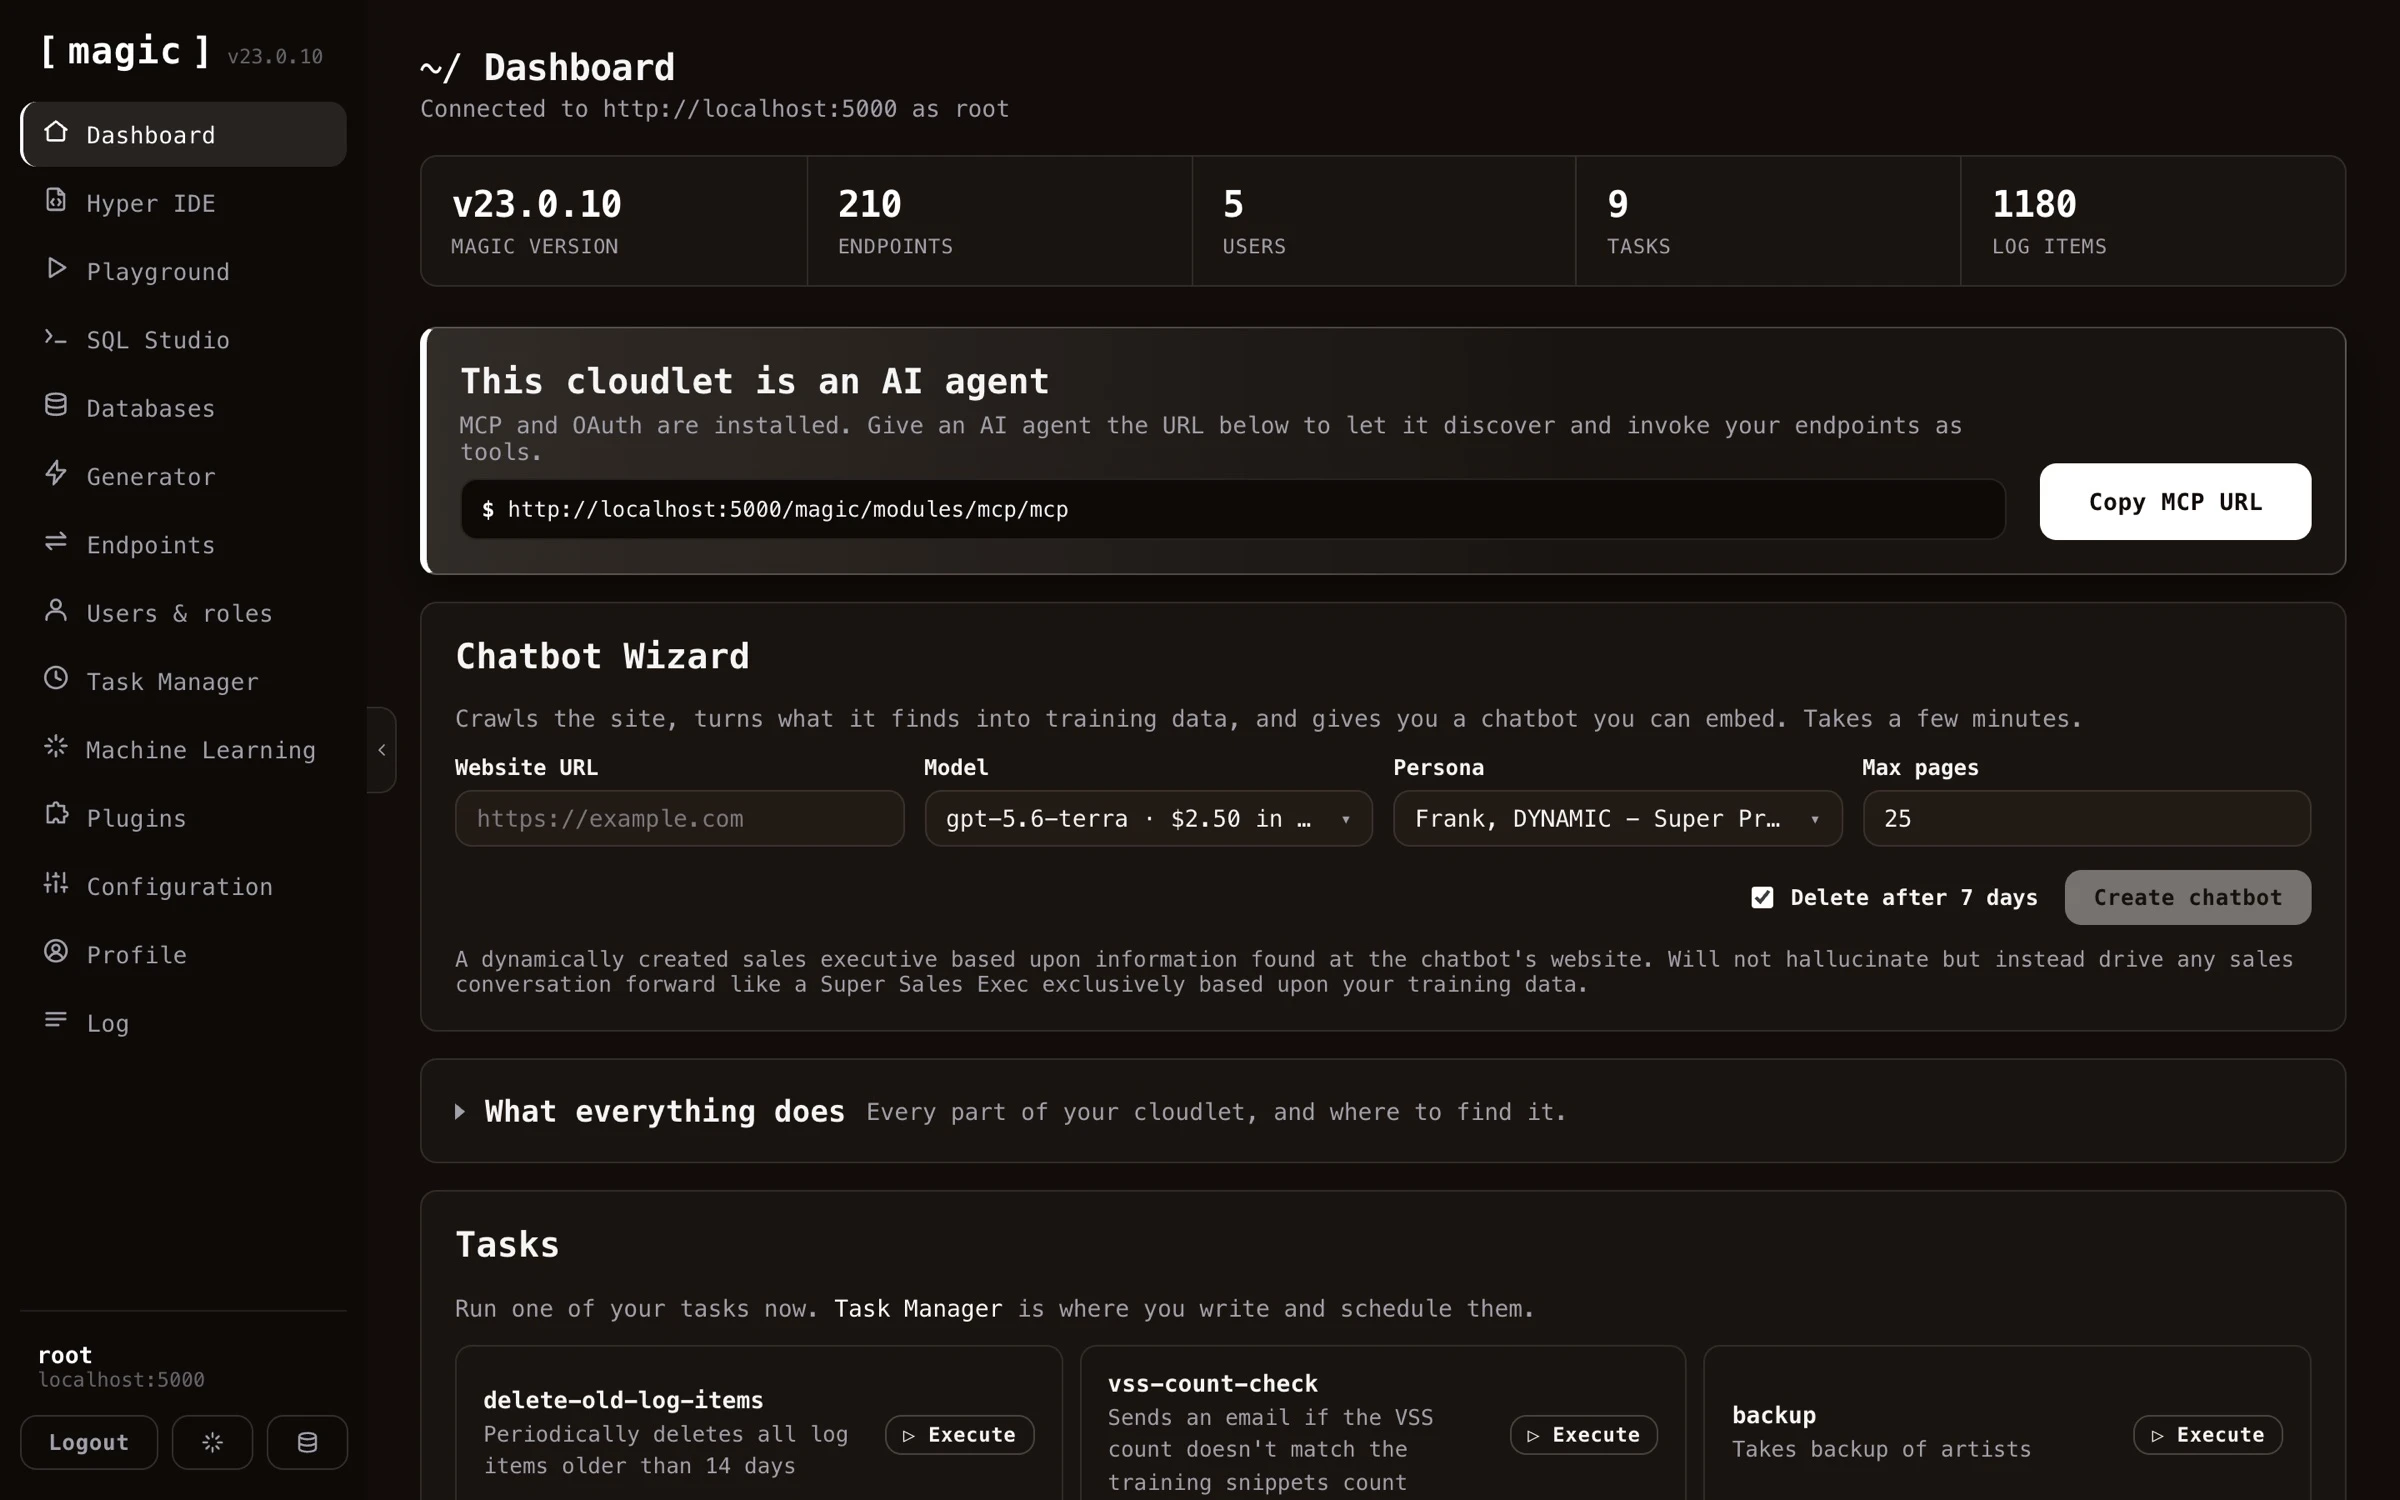
Below the key numbers, the landing page gives you quick access to the things you’ll reach for most often. The Chatbot Wizard crawls a website, turns what it finds into training data, and gives you an embeddable AI chatbot in a few minutes. The API Wizard card starts a guided version of the Endpoint Generator, turning every table in one of your databases into secured REST endpoints in three steps. A “What everything does” section explains every part of your cloudlet and where to find it, and a Tasks section lets you execute your scheduled tasks on demand.
If you get stuck anywhere, ask Frank - AINIRO’s AI support agent, trained on the Hyperlambda and Magic documentation. You’ll find him both in the “What everything does” section and behind the spark button in the bottom of the navigation, and he answers with code you can paste.
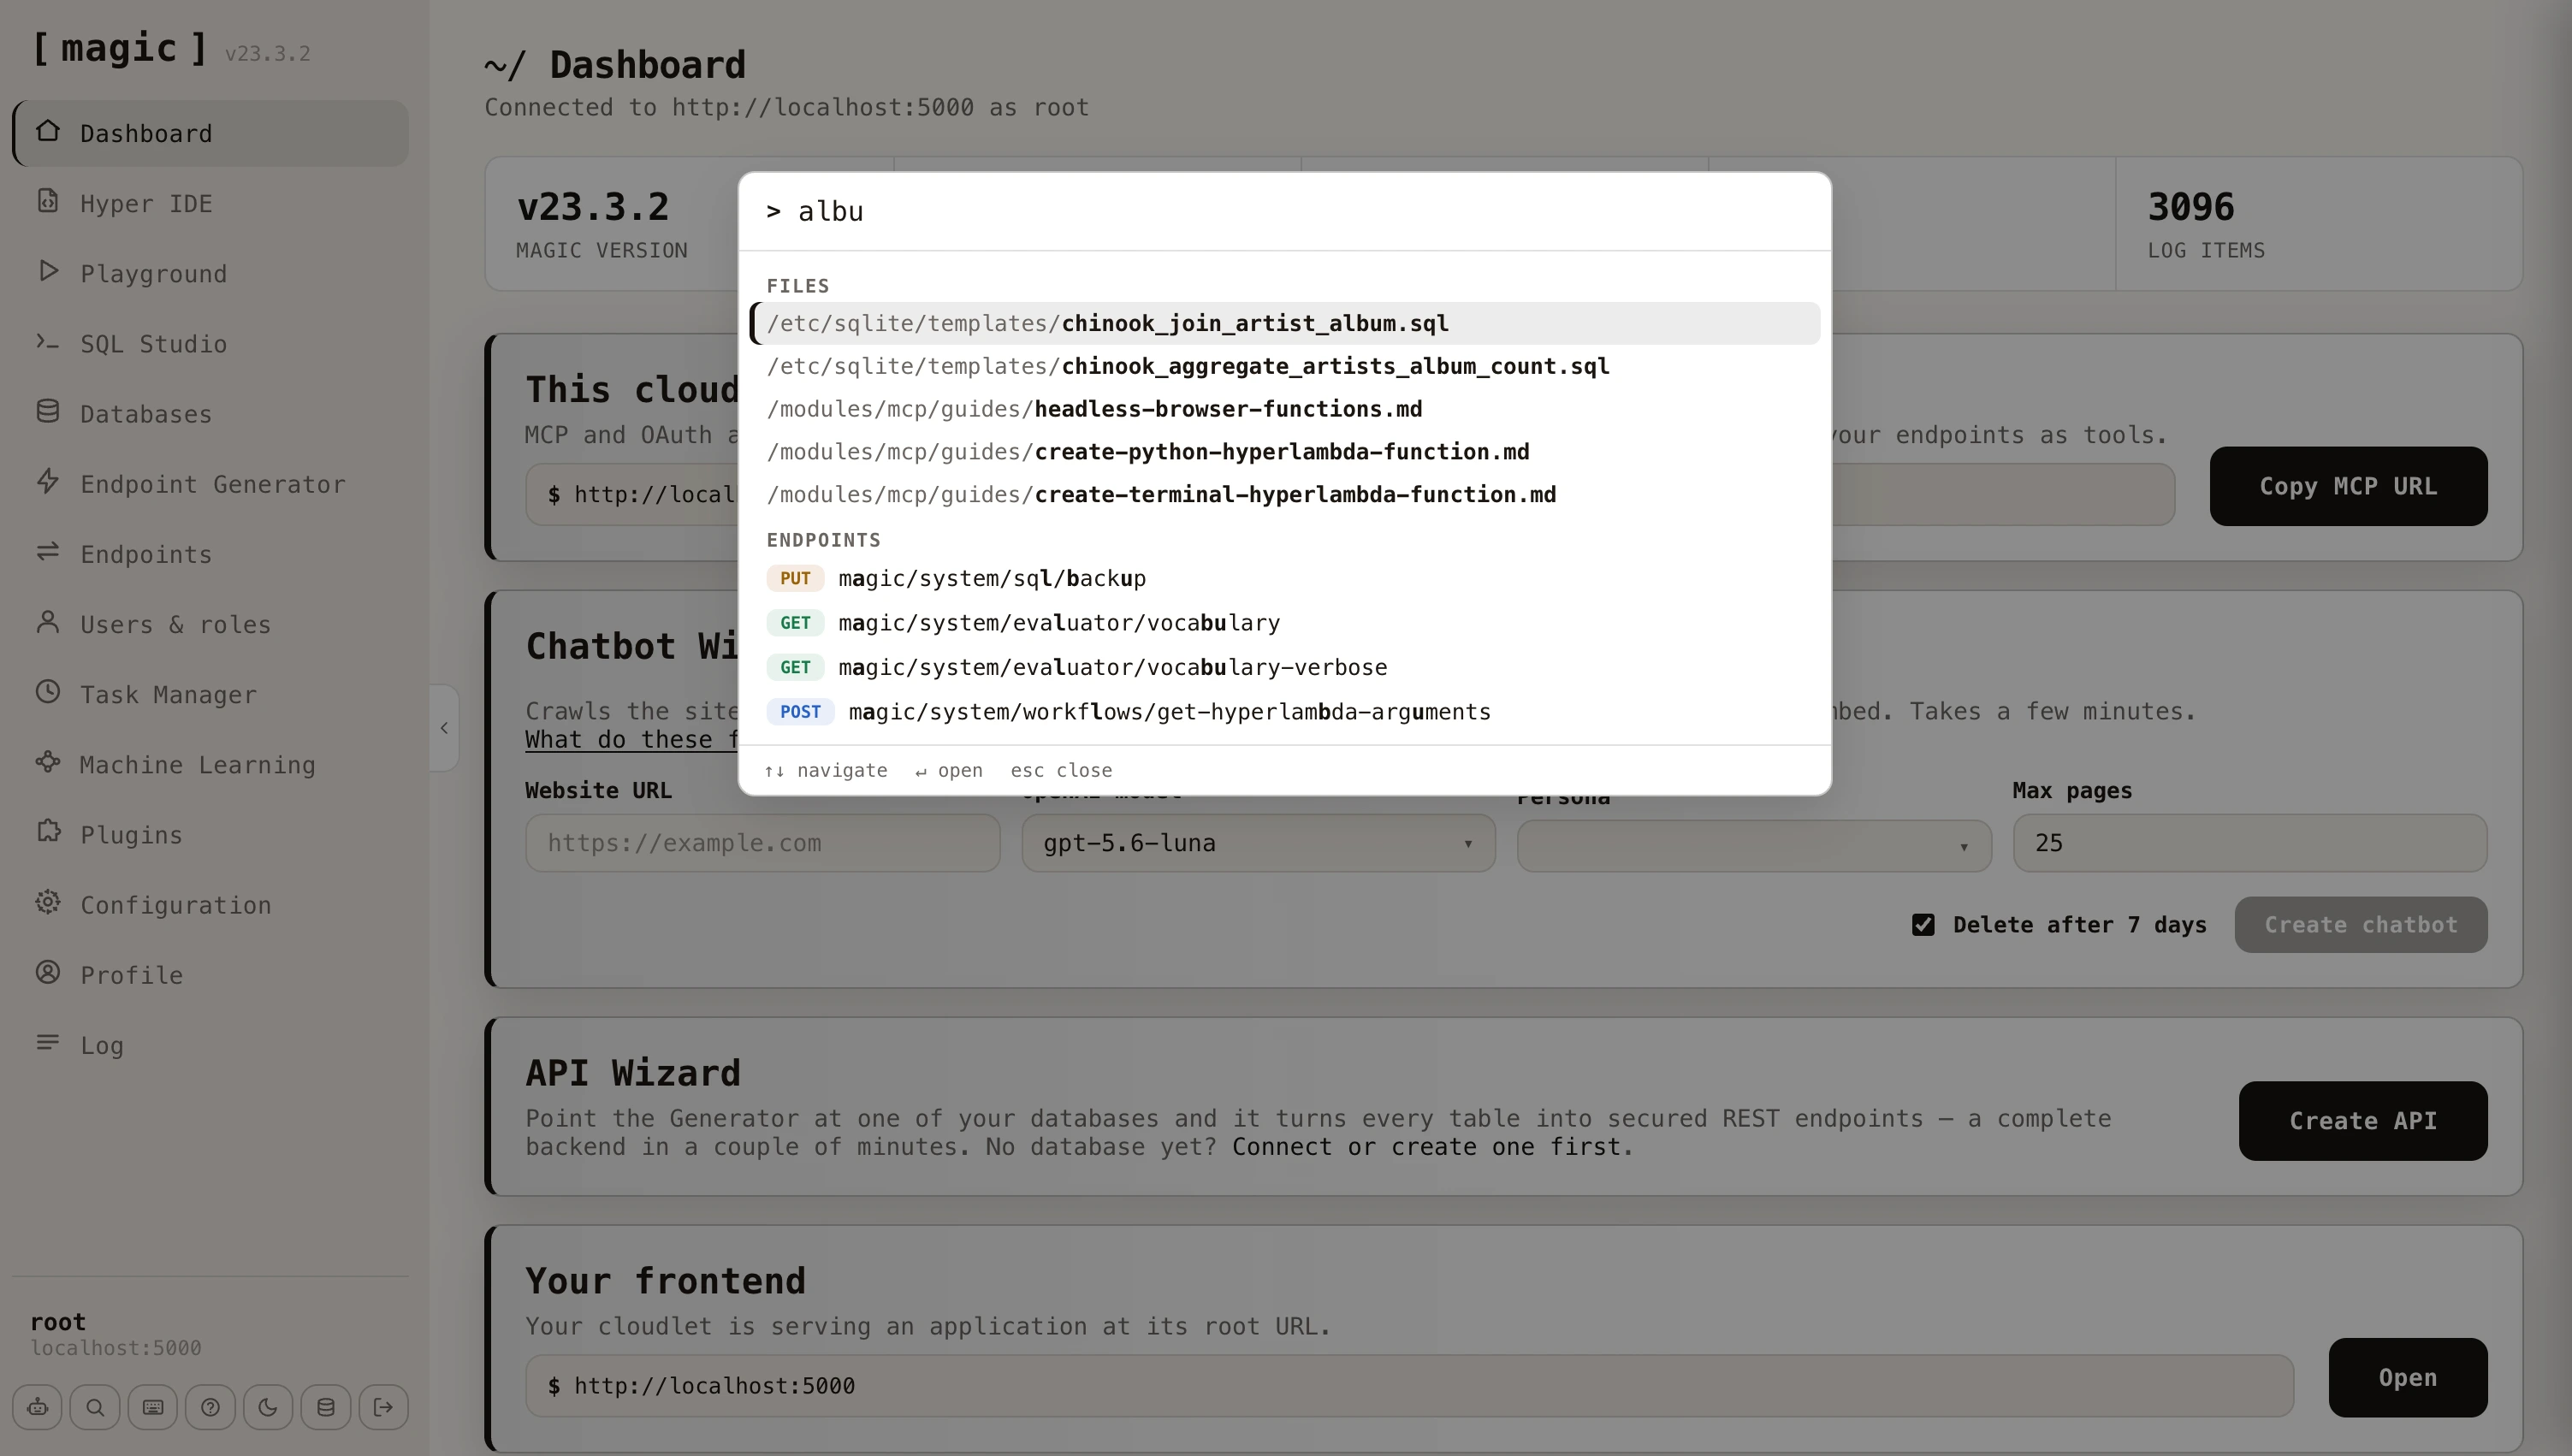
The fastest way around the dashboard is the command palette - click CTRL+K (COMMAND+K on a Mac) anywhere, and one search box jumps you to any page, file, endpoint, task or machine learning model, with fuzzy matching. Picking a task or a model opens it straight in its editor, rather than dropping you on the list it lives in. CTRL+/ shows an overview of every keyboard shortcut the dashboard supports.
The first time you open the dashboard, a short guided tour points out the things worth knowing on the landing page. You can skip it at any point, and re-run it later from the command palette by searching for “tour”. The Chatbot Wizard has a tour of its own, explaining what each field does.
Chat Ops - let the dashboard operate your cloudlet
Where the command palette is the fastest way to get somewhere, Chat Ops is the fastest way to get something done. Press CTRL+. (COMMAND+. on a Mac), describe what you want in plain English, and the dashboard’s own AI agent does the work - generating endpoints, running SQL, reading your log to diagnose a failure, or editing files - showing every function it invoked as you go.
It is the same capability you get by connecting Claude to your cloudlet over MCP, except the AI client is the dashboard you are already signed in to, running as the user you signed in as. It needs an OpenAI API key, and appears once you have configured one.
Create an AI chatbot
The fastest way to experience Magic’s AI capabilities is to create a chatbot straight from the dashboard’s landing page. Provide a website URL to the Chatbot Wizard, choose a model and a persona, and click “Create chatbot”. The wizard crawls the site, scrapes each page it finds, and turns the content into training data (RAG data) for your chatbot - reporting its progress in real time as it works its way through the site.
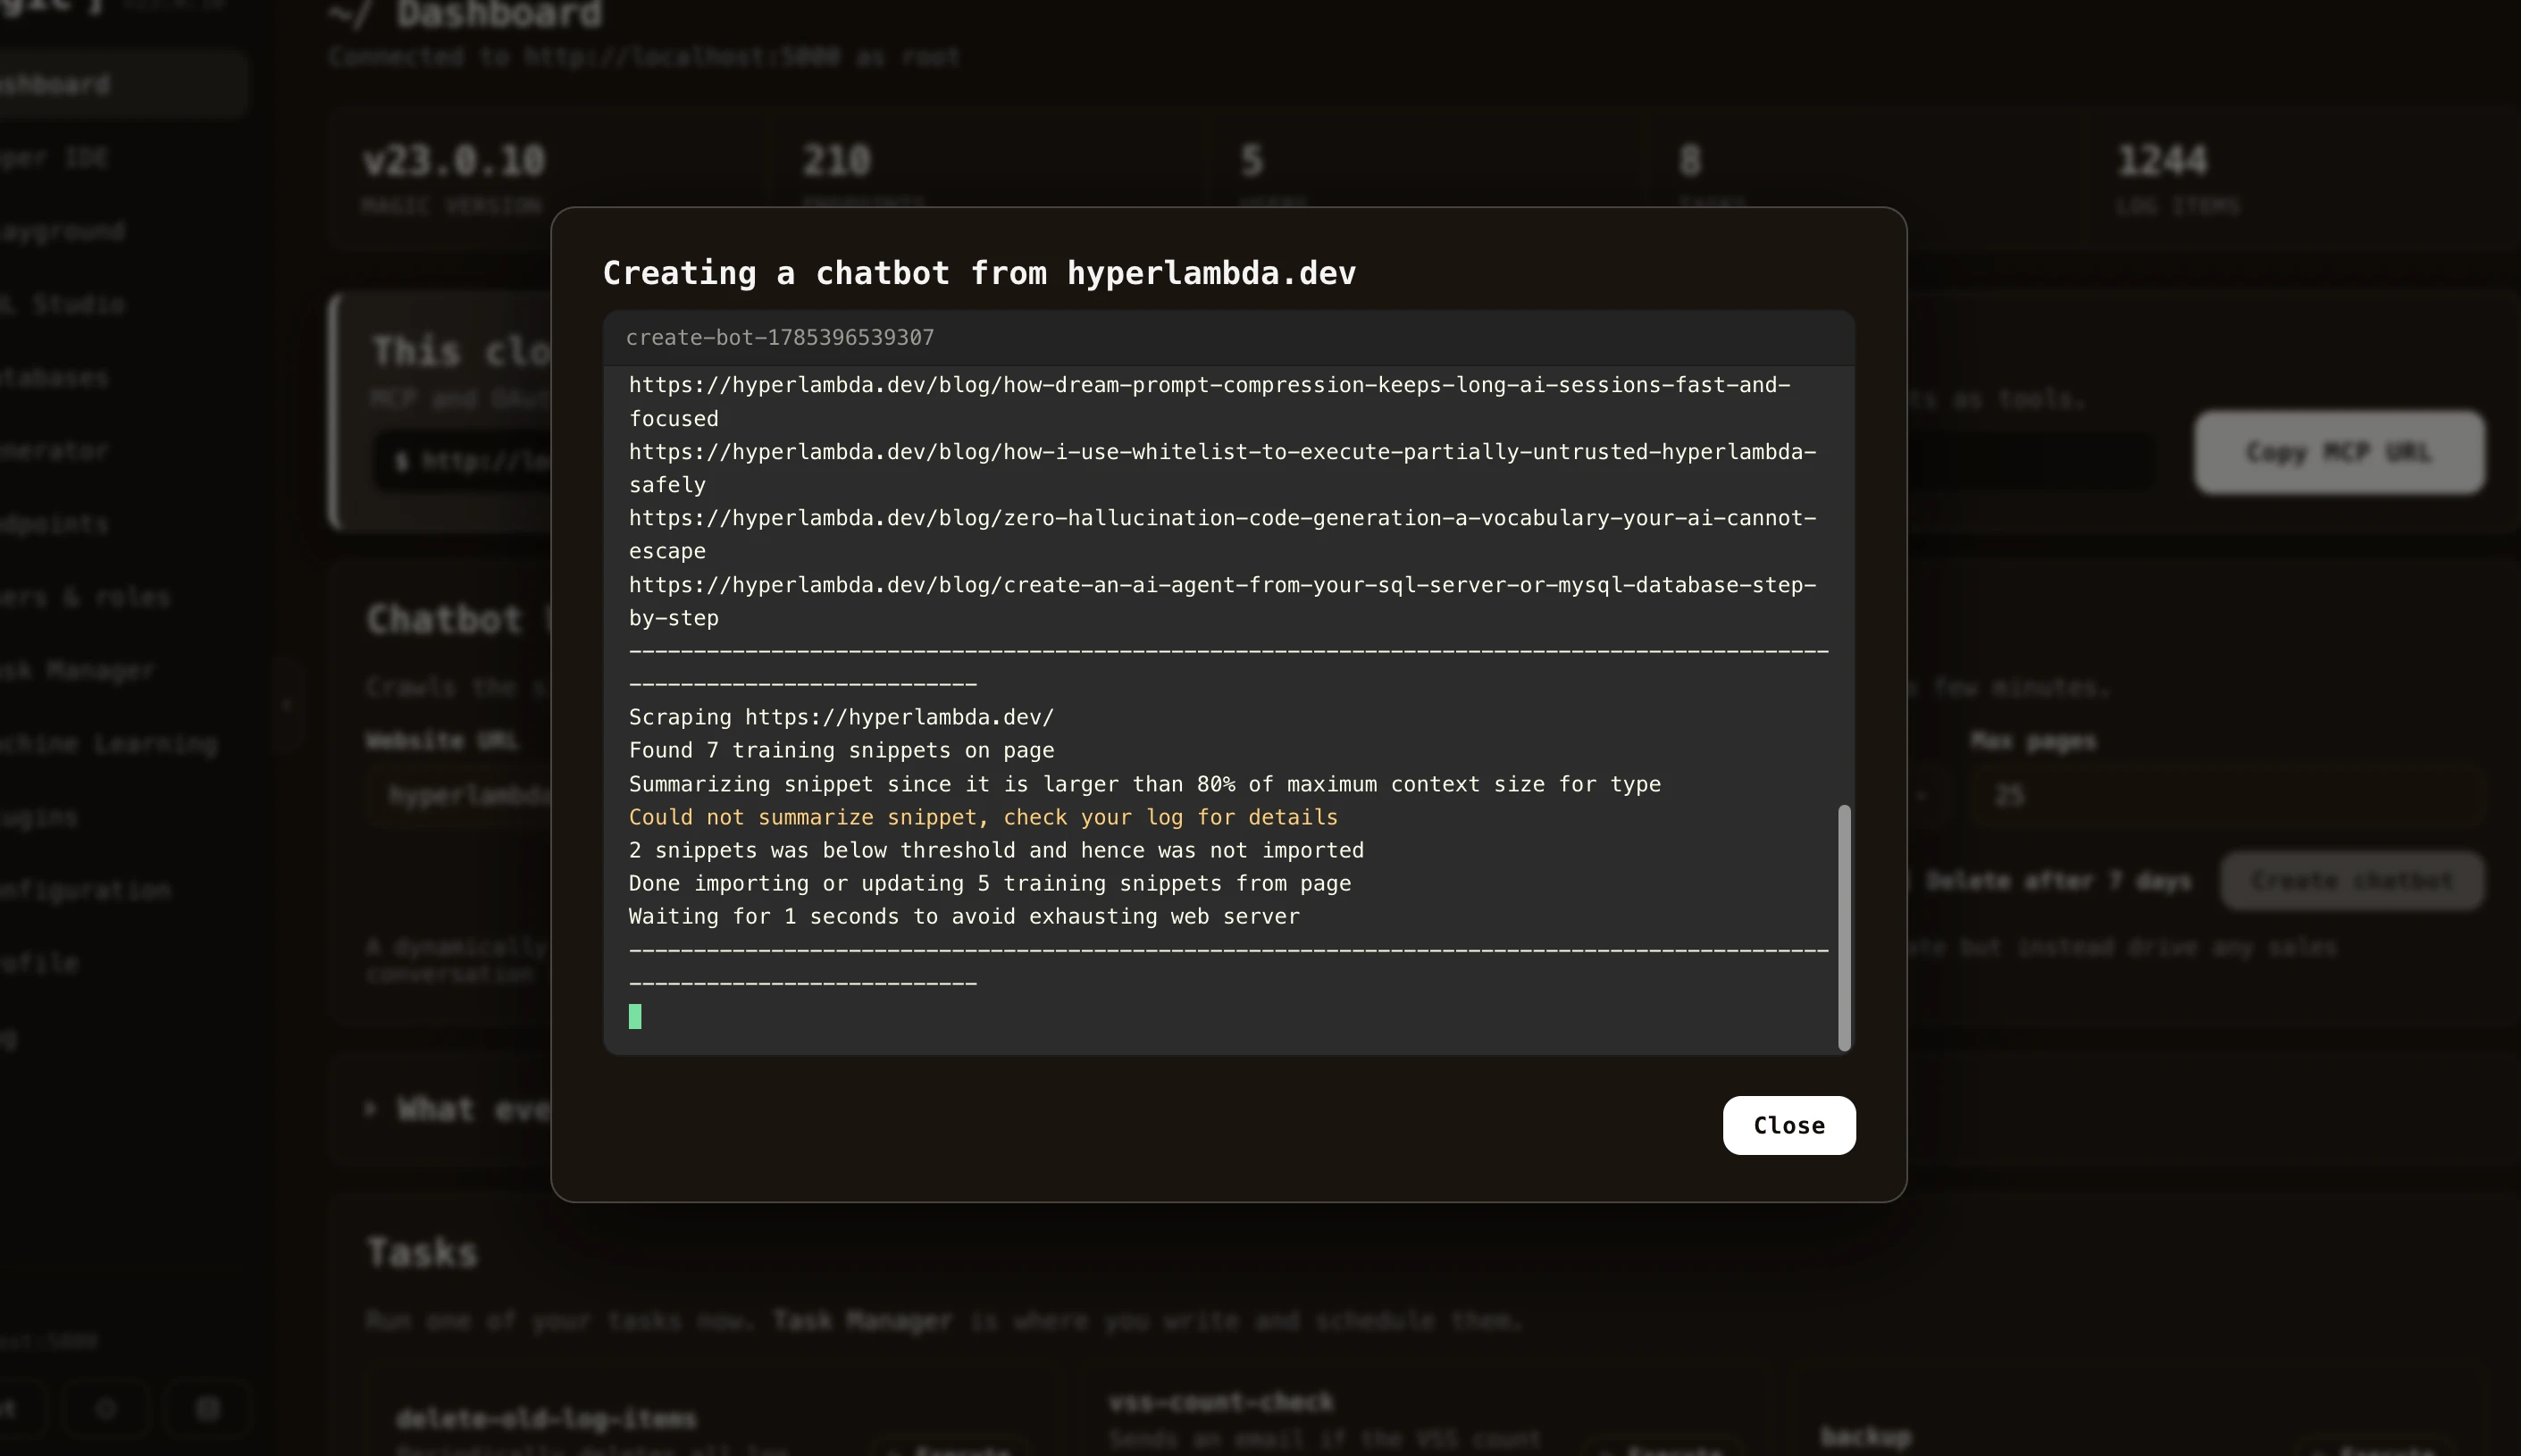
A few minutes later your chatbot is ready, and you can embed it on your website, or use it as the foundation for an AI agent. From here you manage its training data and configuration using the Machine Learning component. Read more about the entire process in the Chatbot Wizard documentation.
Components
Below is the documentation for each individual dashboard component.
- SQL Studio
- Hyper IDE
- Endpoint Generator
- Hyperlambda Generator
- Endpoints
- Users & Roles
- Task Manager
- Plugins
- Machine Learning
- Log
- Hyperlambda Playground
- Databases
- Configuration
- Chatbot Wizard
- Chat Ops
In addition to the above, there’s also the profile component, allowing you to change your password, and change some other settings related to your profile.
Generate token
The most important additional component is probably the “Generate Token” component, that allows you to create long lasting JWT tokens, you can use when interacting with your cloudlet from other systems. Below is a screenshot.
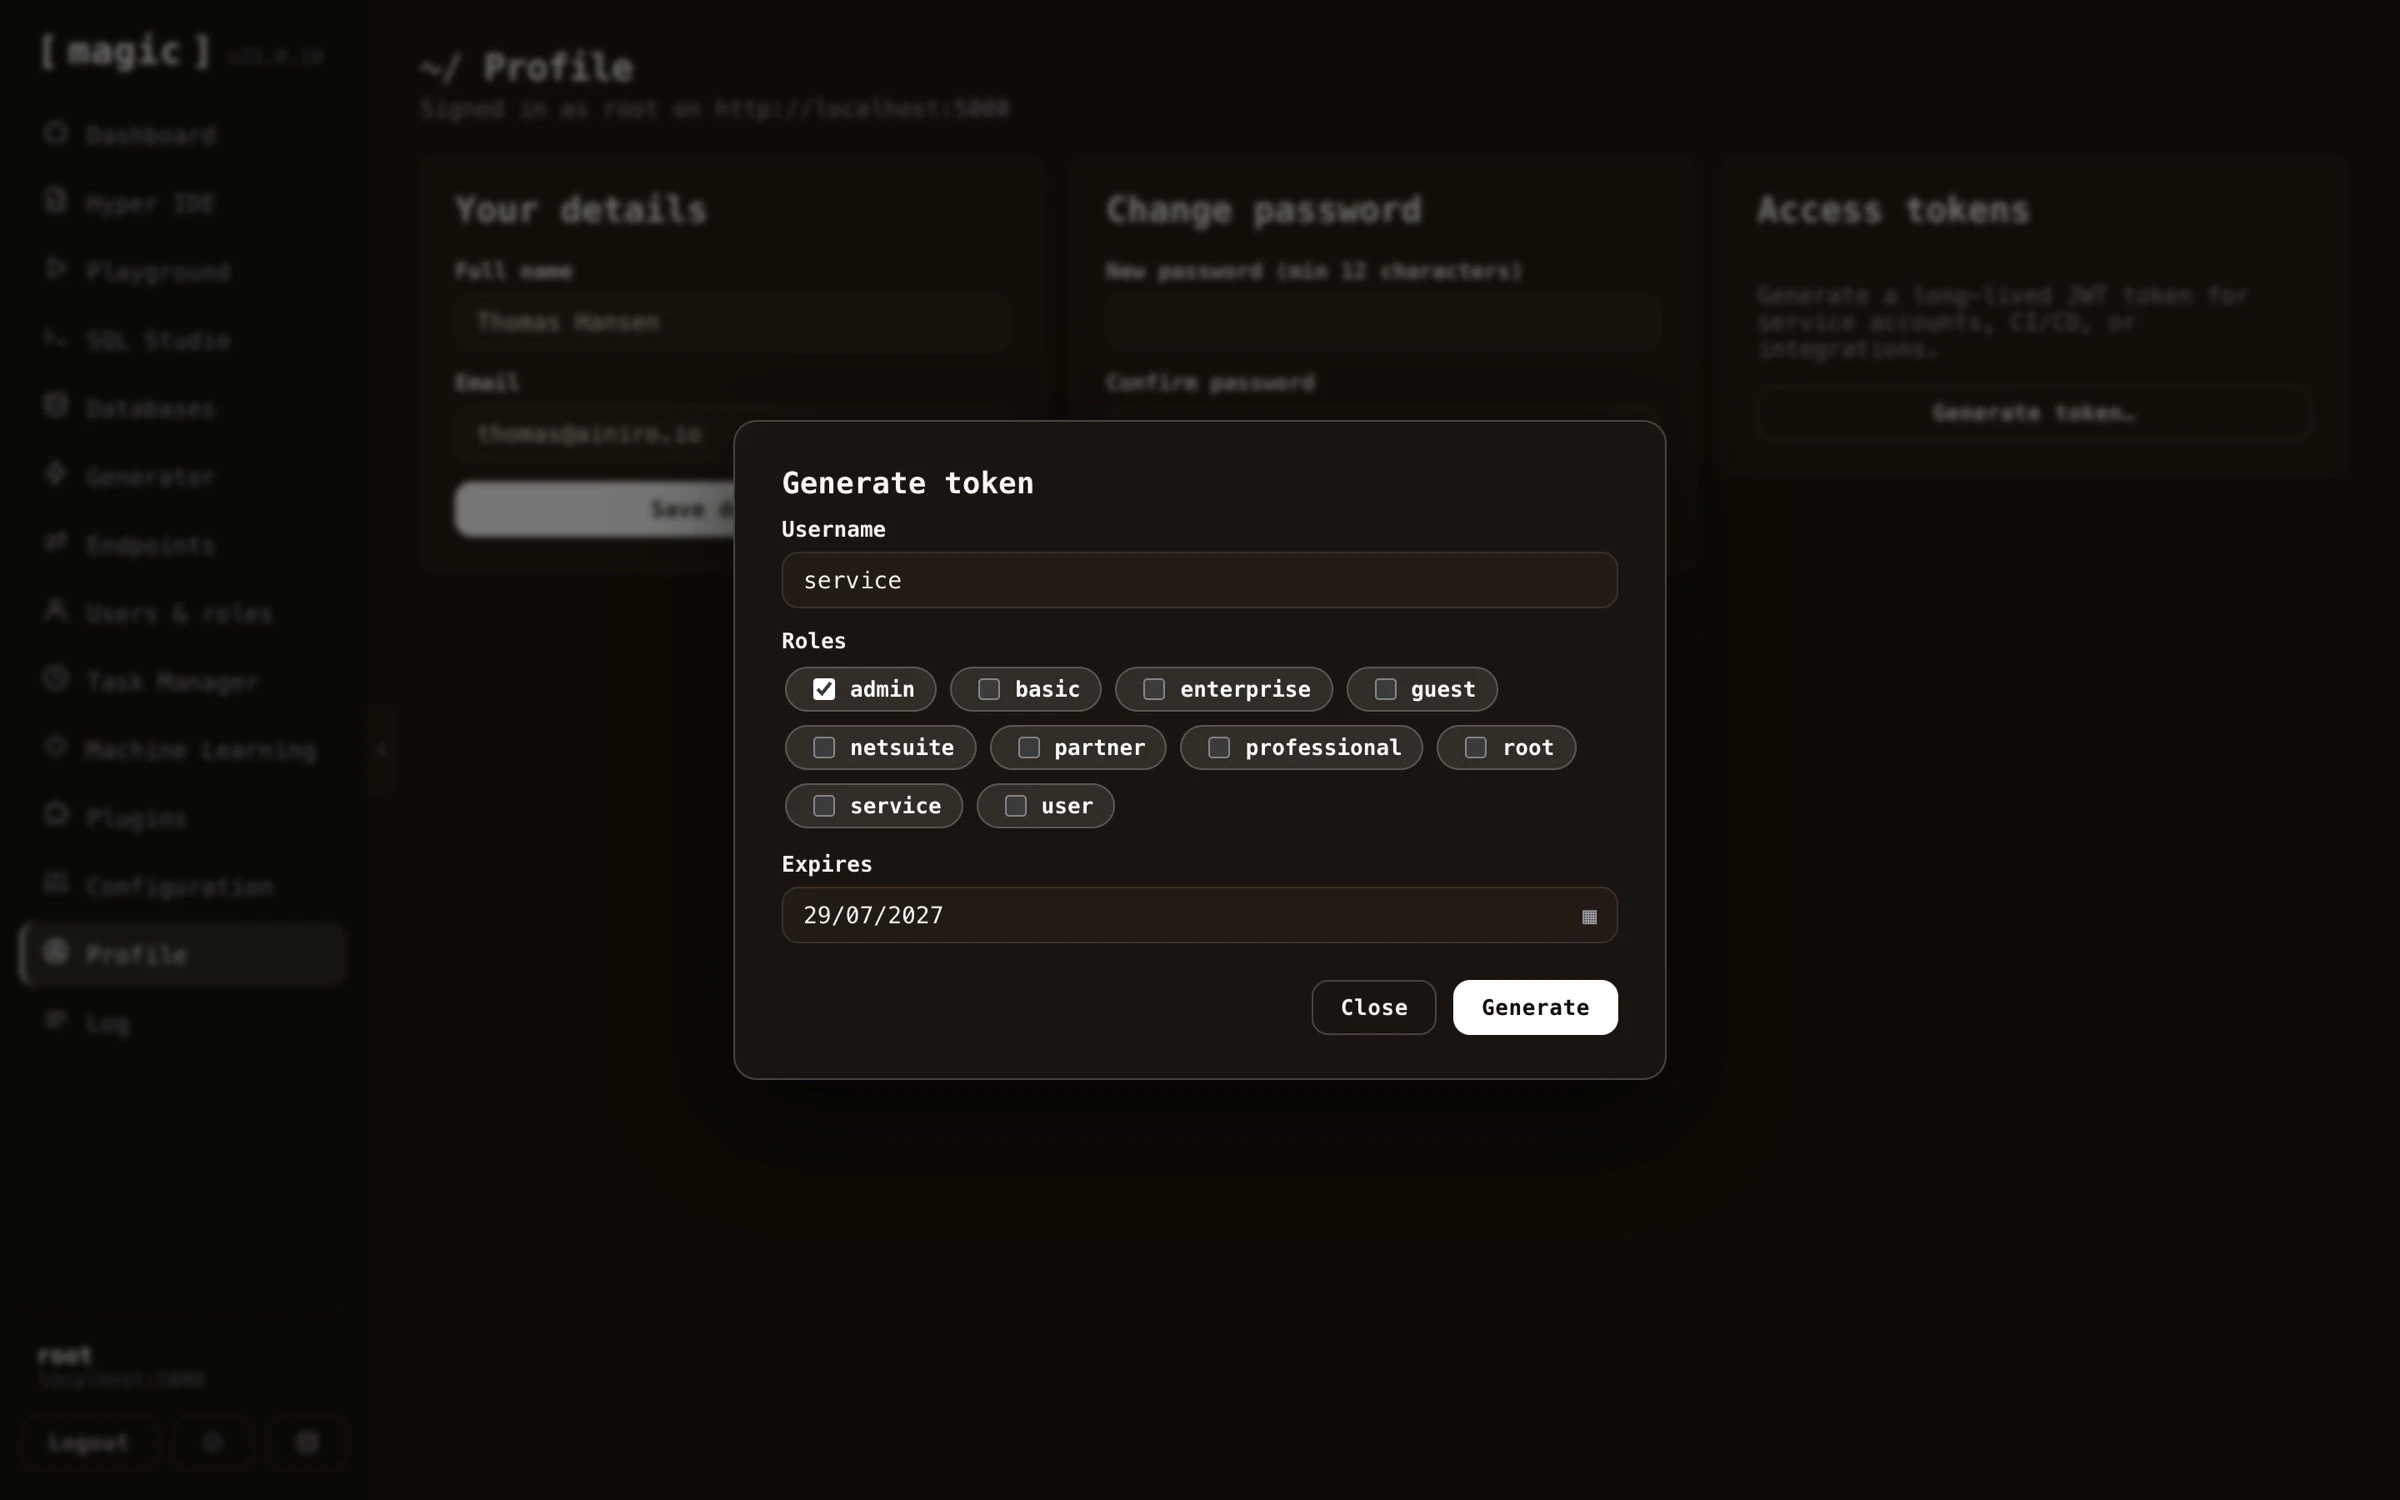
This allows you to create a token you can use to authorize HTTP requests towards your cloudlet, if you need other systems to have extended rights towards your cloudlet. Tokens should be passed into your cloudlet as Bearer tokens in the Authorization HTTP header.