Creating a Custom Design for your AI Chatbot
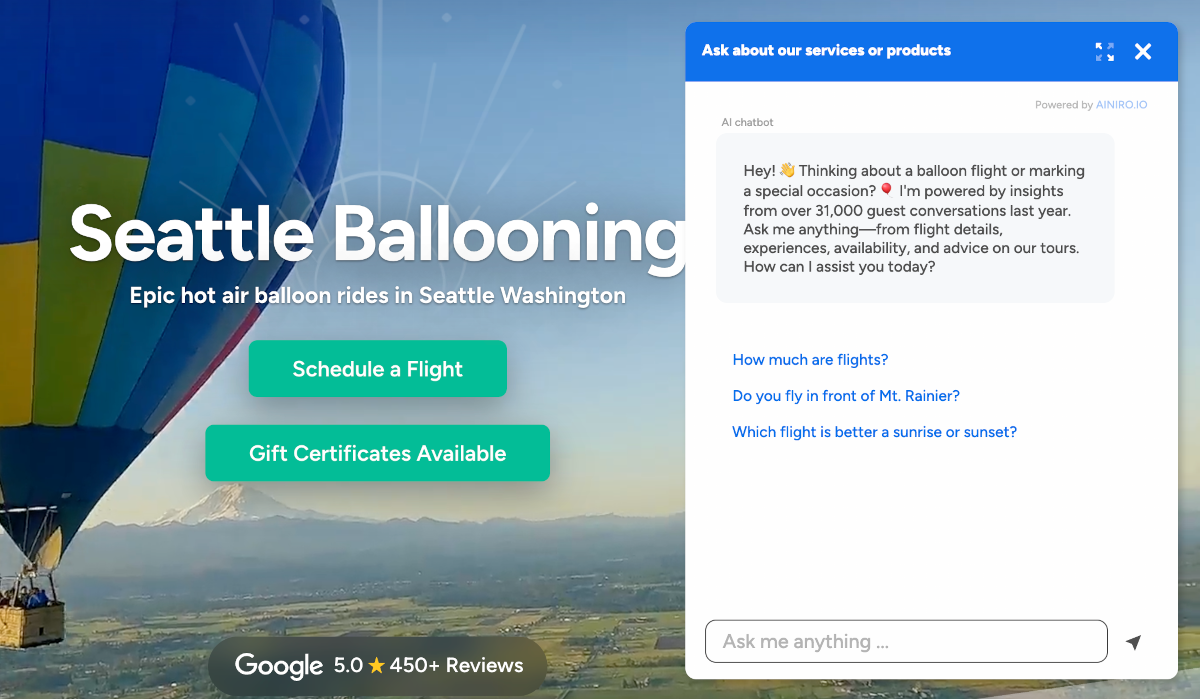
The AI chatbot’s design is easily modified. This is useful of you need to change the chatbot’s design beyond what is possible by changing its colours, or other properties that are dynamically built through the embed screen’s options. Below is a screenshot of how one of our customers modified theirs to have it match their existing design profile.
Internals
The CSS file for the AI chatbot is dynamically included according to a query parameter in your JavaScript embed tag. If you look carefully at your embed script, you will see it’s got a query parameter named “theme”. This query parameter is a reference to a CSS file that must exist in one of two folders. The pre-defined designs we support out of the box are as follows:
- modern-bubbles
- modern-clear
- modern-small-theme
- modern-square
- modern
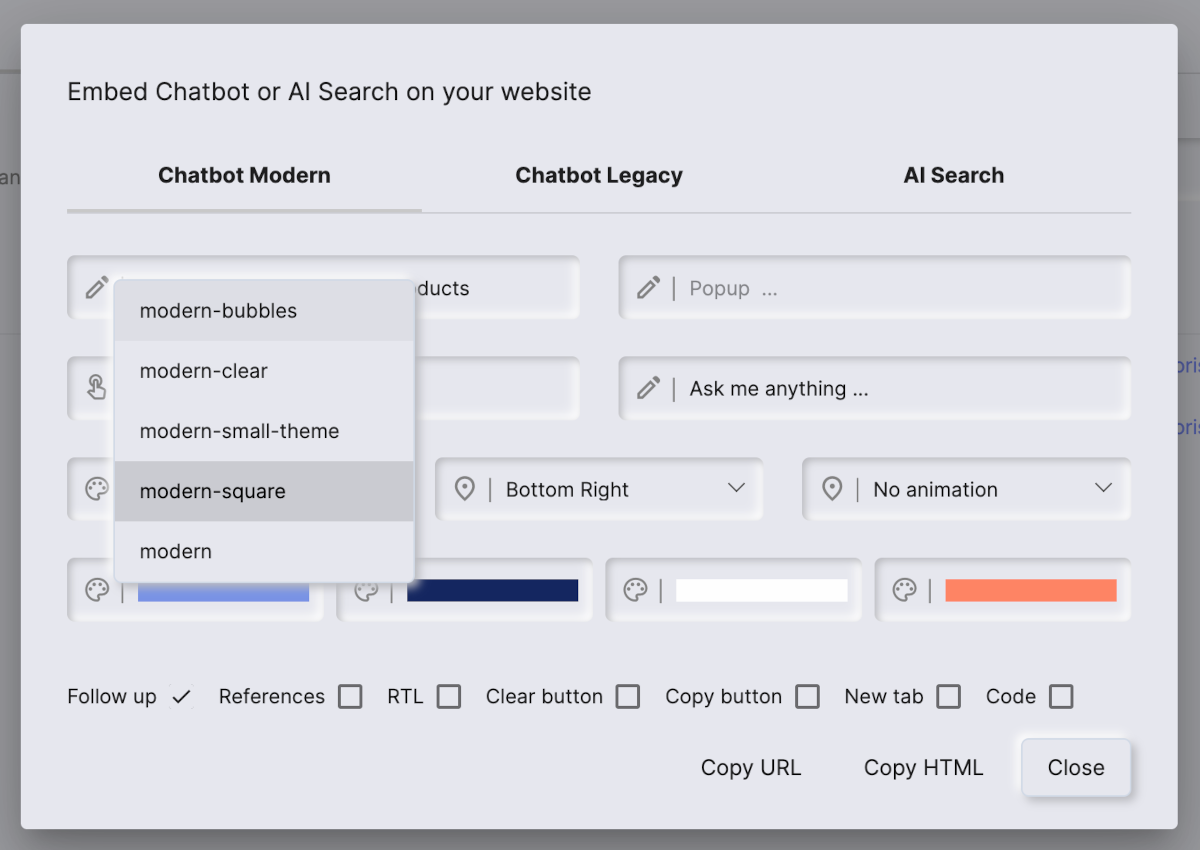
The above are basically references to CSS files that exists within your cloudlet. When you embed your AI chatbot, the embed screen resembles the following.
These CSS files are fetched from the “/system/openai/front.files/chat/” folder. This folder contains the system designs and you should not modify these files, but rather create your own file based upon one of these files and put into your “/etc/system/openai/css/chat/” folder. This makes the system recognise your CSS file as a custom theme automatically, and results in that you can choose this theme as you embed your chatbot. Below is an image illustrating how this looks like for Seattle Ballooning specifically.
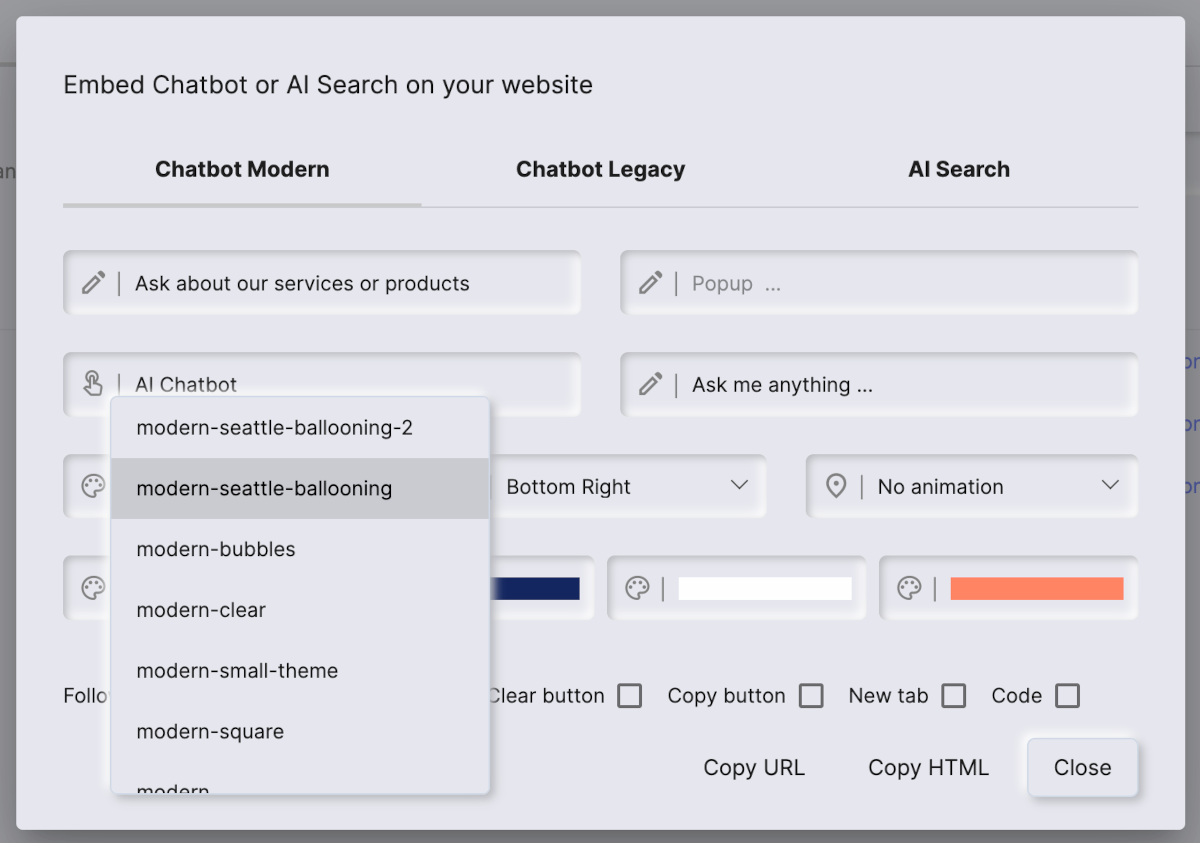
In the above screenshot there are two custom themes in their cloudlet named;
- “/etc/system/openai/css/chat/modern-seattle-ballooning-2.css”
- “/etc/system/openai/css/chat/modern-seattle-ballooning.css”
The way this works, is that when you embed your AI chatbot using the embed button, the system will list all CSS files in both your system folder and your custom design folder, allowing you to choose any CSS file from one of these folders. However, and this is very important; Your custom design files must start with “modern-“. This is because of our legacy CSS structure, allowing the system to filter out files not starting out with “modern-“ and discard all of the files as “legacy design files”. Only files starting with “modern-“ are considered as modern themes as you embed your AI chatbot, so to create a new custom theme, you can create a file named for instance “/etc/system/openai/css/chat/modern-my-theme.css” to make the system recognise your design as a modern design.
These CSS files are pre-processed in the cloudlet as they’re embedded, and parts of their content is dynamically substituted. For instance, a common CSS file is by default dynamically included into your CSS file at a specific position by doing a simple string substitution operation. Specifically the .common{opacity:0} is important to keep exactly as is if you want this dynamic substitution to take place. This part of your custom theme is being dynamically substituted with the content from the “/system/openai/front.files/chat/common.css” file. This common file contains common CSS properties you’d normally want to include in your custom theme. Below is an example of how this would look like if you create your own theme.
@import url(https://fonts.googleapis.com/css?family=Open+Sans:400,400i,700&display=swap);

/*
 * THE LINE BELOW MUST BE EXACTLY AS IS TO INCLUDE THE COMMON CSS PARTS
 */
.common{opacity:0}

html>body.ainiro_bdy>button.ainiro,
html>body.ainiro_bdy>div.ainiro {
  font-family: "Modern", Sans-serif
}
/* ... the rest of your CSS here ... */
Notice, if you ommit the .common{opacity:0} parts, this common CSS file is not included into your CSS file as the cloudlet is returning it to the client.
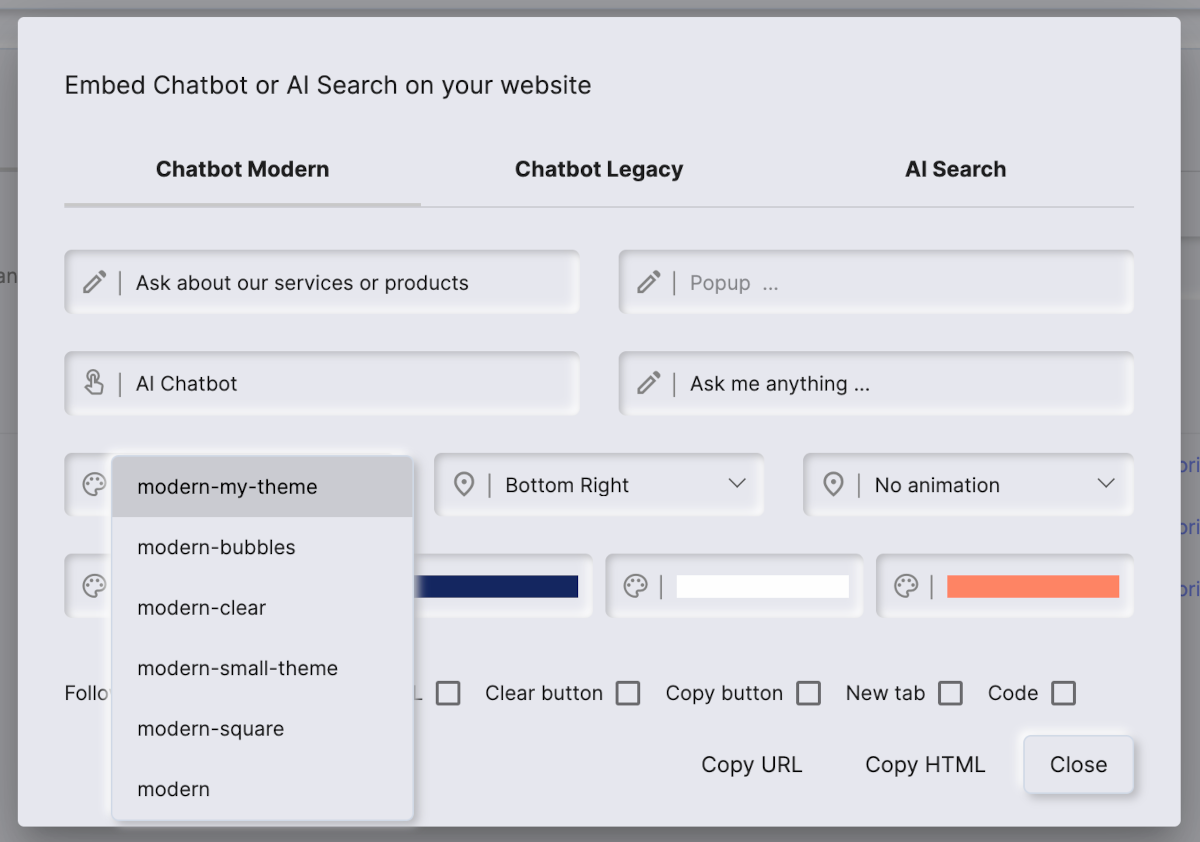
If you create your own theme CSS file named “modern-my-theme.css”, your embed form will end up resembling the following.
CSS Structure
The AI chatbot has two primary DOM elements; The AI chatbot button that opens the chatbot allowing your users to actually chat with your machine learning model, and the AI chatbot’s primary surface. By default only the button is visible, and the chatbot’s surface is rendered as invisible. When the button is clicked the JavaScript file will hide the button and show the chatbot surface.
Both of these CSS selectors starts out with the string “ainiro” to avoid clashing with existing selectors in your page. Below is an example of how the CSS properties might look like for the chatbot’s button when it’s hidden.
html>body.ainiro_bdy>button.ainiro.ainiro_hide {
  animation-name: ainiro_hide_button;
  animation-duration: .4s;
  animation-iteration-count: 1;
  animation-fill-mode: forwards;
}
In addition the chatbot will add a CSS selector to the body tag of your page during inclusion to allow us to override some properties on the body tag itself. These are important to stop scrolling of the page during a chat session, and they also allows us to create extremely specific CSS selectors, such as illustrated above, ensuring that our properties takes precedence over global CSS properties created by your existing CSS.
Hence, to override CSS properties you should use fully qualified CSS selectors, such as for instance html>body.ainiro_bdy>button.ainiro.ainiro_hide. This ensures that your custom theme does not interfere with other CSS/DOM elements you have in your page.
We suggest that if you want to create a new theme, you start out by copying the content of one of our system themes, and pasting this into your custom theme CSS file, for then to start modifying its CSS properties.
Notice - The structure of the CSS file assumes there exists several CSS variables in your page. These are created by the JS embed script using your query parameters, and are there to ensure that colours and other dynamic settings from your embed script are correctly applied. In general you should not directly modify neither the values of your CSS properties, nor the values of these dynamically injected variables, but rather choose the correct values as you are embedding your chatbot. This allows you to use the same theme with different colour profiles, etc. Below is an example of such a CSS variable.
html>body.ainiro_bdy>button.ainiro:hover,
html>body.ainiro_bdy>button.ainiro:active,
html>body.ainiro_bdy>button.ainiro:focus {
  transition: color .1s ease-in-out;
  color: var(--ainiro-link);
}
These variables all starts out with “ainiro”, and if you copy an existing theme to start out creating your own design, these variables are already correctly applied. As a general rule, you should not change any of the CSS properties where such CSS variables are used.
CDN
At AINIRO we’re using CloudFlare as our content delivery network (CDN). CloudFlare will apply some aggressive caching on your CSS theme file, preventing you from seeing changes when it’s been served once or more. To bypass the cache during editing, the AI chatbot itself has a v query parameter. This query parameter for the JS file will be appended into the CSS file embed tag, allowing you to bypass the CloudFlare cache by changing the URL.
This v parameter is actually not used for anything, and solely exists to allow for bypassing our CDN cache. However, this implies that every time you actually edit your CSS file, and you want to see the changes in the frontend, you will have to change the value of this v query parameter. You can change it to anything you wish, since it’s not used for anything else besides bypassing the cache - However, we advice to use some sort of numbering logic here, making it easier to increamentally apply changes without accidentally choosing a value you’ve previously used. The process for editing your CSS hence becomes;
- Edit your custom theme’s CSS file from within the cloudlet using Hyper IDE
- Change the
vquery parameter value of your embed tag - Refresh your frontend where you’ve embedded your AI chatbot to see the results from your edits
Below is how this would typically look like from within Hyper IDE.
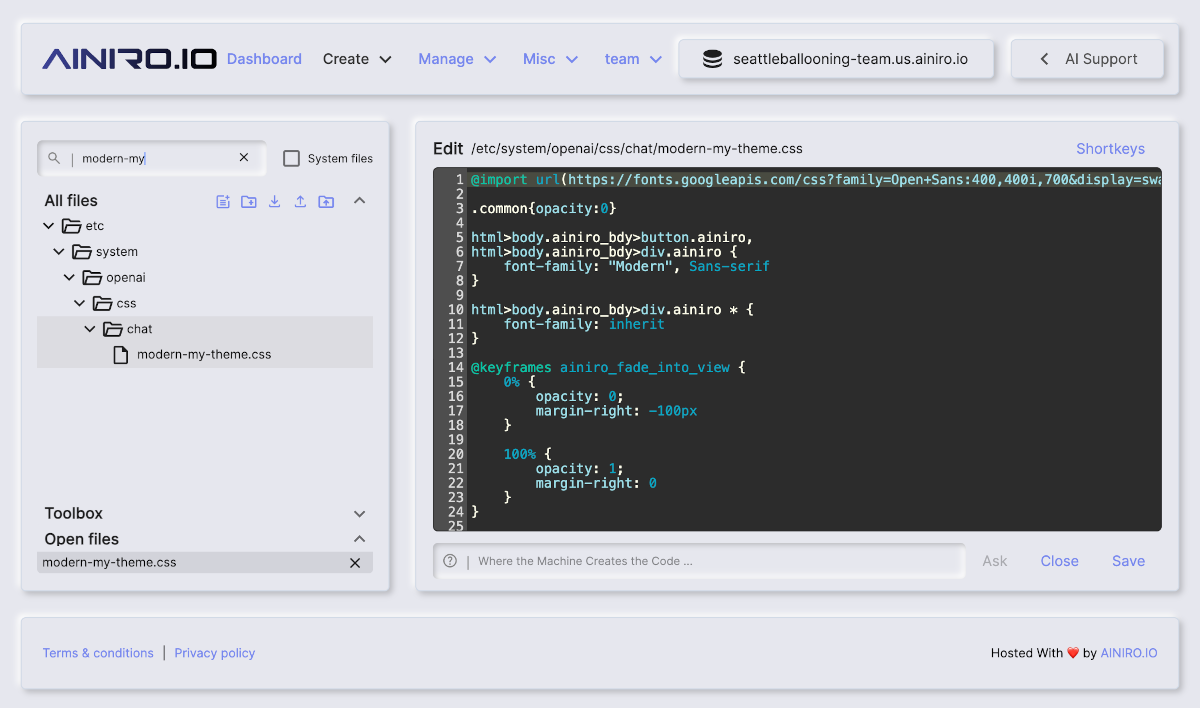
Notice, how to edit your CSS is beyond the scope of this article, and you should obviously know and understand CSS in order to create your own theme. We recommend using for instance the “Inspect” feature of your browser to see the CSS values of individual properties, and use this as the means to “visually design” your AI chatbot during usage.
Also please realise that you can minify your CSS and create an additional file in your cloudlet ending with .min.css. This file will be prioritised during inclusion of your CSS, allowing you to use the minified version instead of the full version. You do not have to change the query parameter for the chatbot, since the cloudlet will automatically prioritise files ending with .min.css, without you having to change your embed script.
Wrapping up
The process of creating your own theme is a little bit complex, but the advantages is that if done correctly, the bandwidth consumption of your AI chatbot will never exceed 60KB - And your AI chatbot’s static files will be served blistering fast, due to a very aggressive CDN and caching strategy.
In addition, the fully qualified CSS selectors allows us to specify overrides for DOM elements highly specifically, without making our CSS influence the rest of your page’s CSS and vice versa. And since the AI chatbot itself will dynamically load resources on demand, the end result becomes the absolutely smallest and fastest page load time for an AI chatbot that exists in the industry - Something we are very proud of for the record.
If you still find this difficult, and you need help to create a custom theme for your AI chatbot, this is one of many services we offer at AINIRO, and you can contact us below to get started.